

About This Project
In this tutorial, we will be learning about the RFID door lock system using Arduino. How it is working, how the sensor works and how to enable and disable the RFID reader.
Project Info
- Programming Platform: Arduino IDE
- Difficulty: Intermediate
- Estimated Time: 2 Hr
- Category: Arduino
- Tags: RFID TAG READER, Arduino, Jumper Wires BreadBoard.
Watch the video for RFID door lock system using arduino here.
Introduction
RFID stands for Radio Frequency Identification and is widely used in security systems like door access security systems, office attendance registers, and many more. The tutorial will tell you how to make RFID Door Lock System Using Arduino project using RFID sensors.
RFID Tag: RFID Tags are small and compact objects that contain microchips and a mini antenna. It is used in wireless security systems that operate when Tag Reader comes in contact or around the sensible area. RFID does not require line-in-sight barcodes for scanning.
Breadboard: Breadboard is an open-source electronics component that has numerous electrically conductive slots where we can directly insert any electronics components like resistor, capacitor and inductor. It is an easy-to-use hardware component that requires no soldering. The breadboard is mainly used for testing a circuit before permanently soldering it on a PCB.
Arduino: Arduino is an open-source programmable electronics platform that is based on easy-to-use hardware and software. It is a well-known component for building electronics and robotics projects. It works together with a piece of software called Arduino IDE (Integrated Development Environment) that runs on the computer to write a program and upload it to the Arduino board. Its operating voltage is ranging from 3.3v to 5v.
On the basis of constructions, Arduino has three different types viz. Arduino Nano, Arduino Uno, and Arduino Mega. All three boards have different numbers of Input and Output Pins regardless of the same working principles.
The Arduino IDE is a simplified version of the C++ programming language, and it is easier to learn to program. The central part of an Arduino board is the Microcontroller which is responsible for Input/Output, Read/Write, storing data, and most importantly processing.
Jumper Wires: Jumper wire is an electrical conductor used for building electronics and robotics projects. It is used only in low voltage and current because of its small conductor diameter. It is available in different lengths and colours.
Components Required
| Sr. no. | Image | Component | Quantity |
|---|---|---|---|
| 1 | 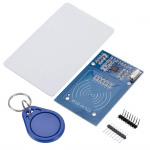 |
RFID TAG READER, KEY | 1 |
| 2 | 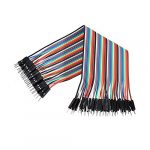 |
Jumper Wires | As Per Requirement |
| 3 |  |
Arduino | 1 |
| 4 | 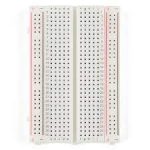 |
Breadboard | 1 |
Building Guide
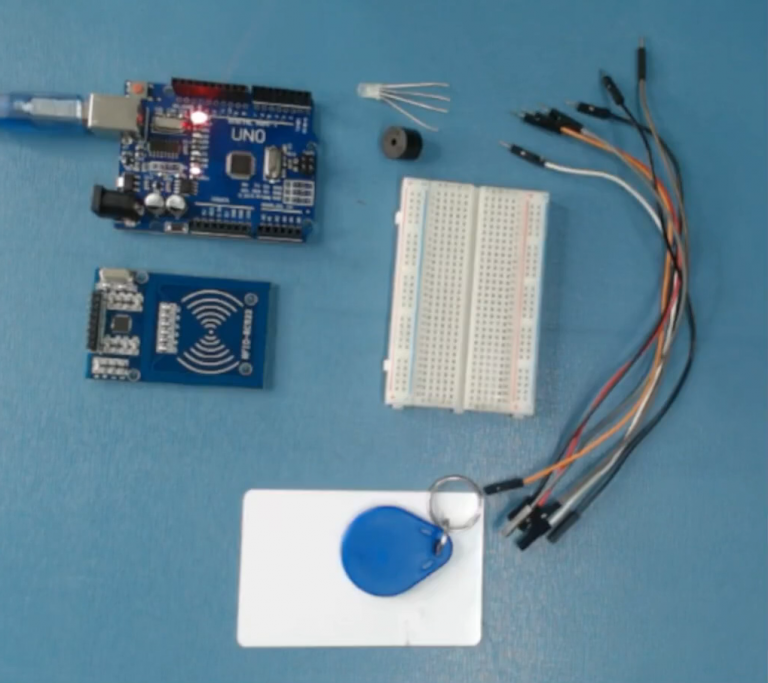
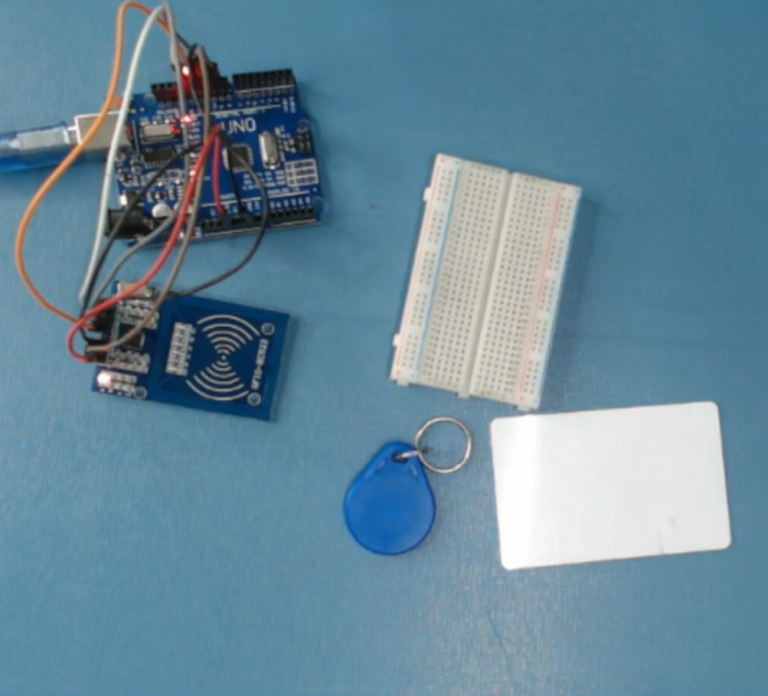
Step 1: Assembly
- Gather all the required components for making RFID Door Lock System Using Arduino.
Step 2: Circuitry:
- Make the circuitry as shown below:
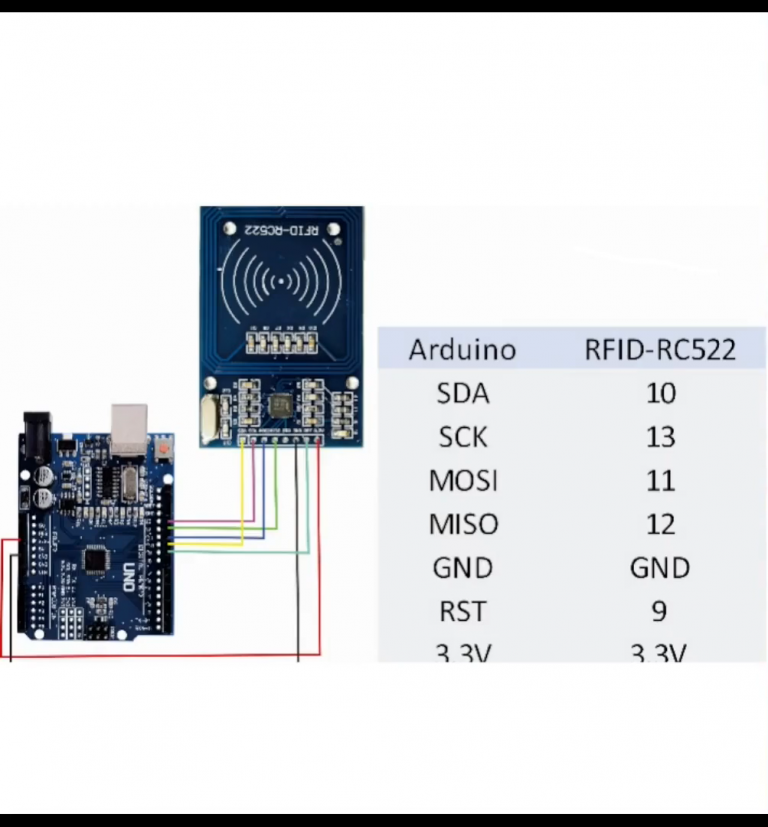
Step 3: When all the connections are done, start coding.
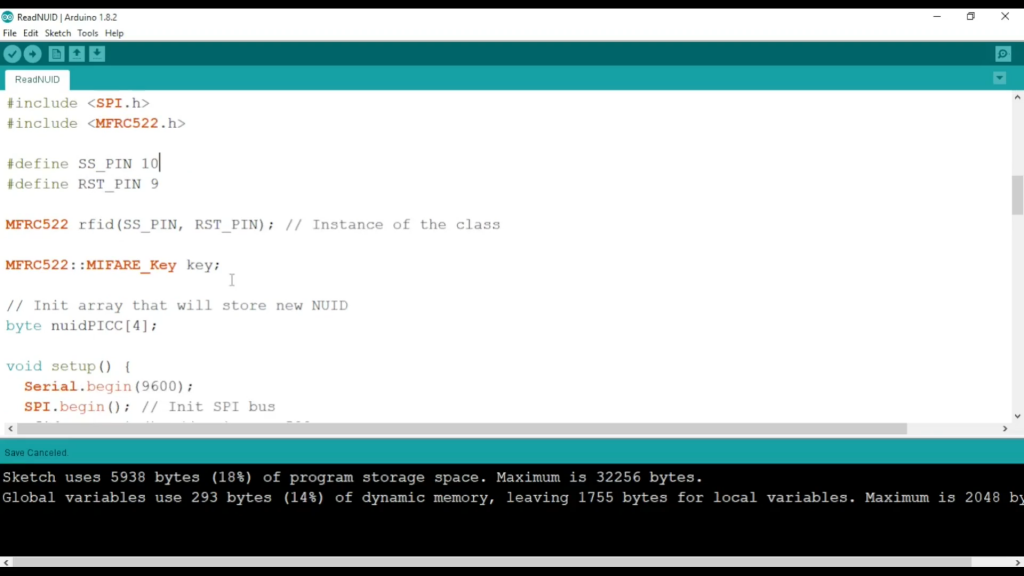
CODING:
Open Arduino IDE Software for coding.
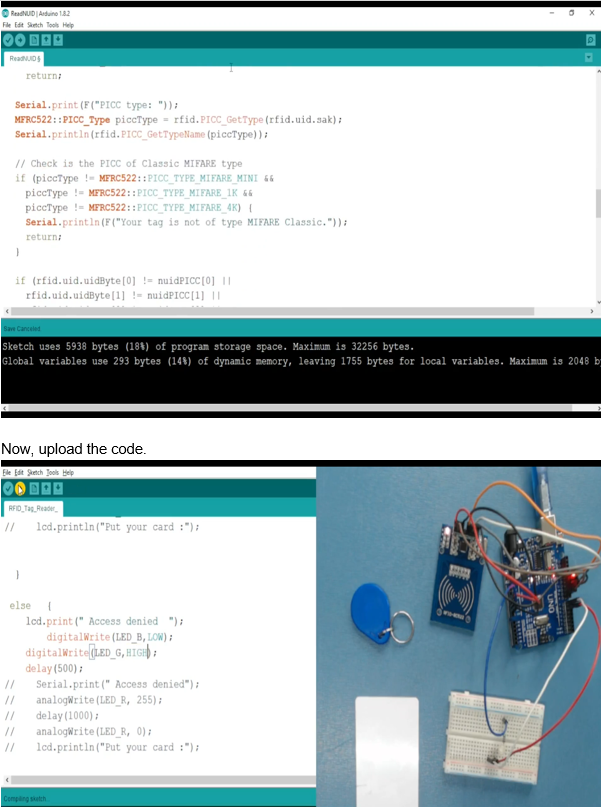
Step 4: When the uploading is done, test the project by sensing the RFID KEY to the RFID TAG. If key1 and key2 are activated, the RGB LED will light up in different colours. We can also use the same coding for the SERVO MOTOR to make the Door Lock System.
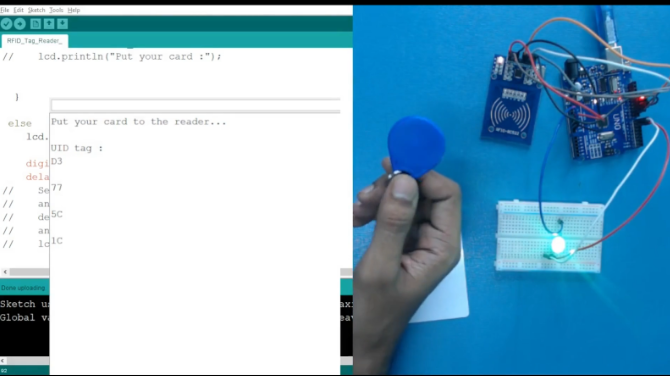
Don’t miss out on the video tutorial where you will get a detailed understanding of the RFID Door Lock System Using Arduino project.
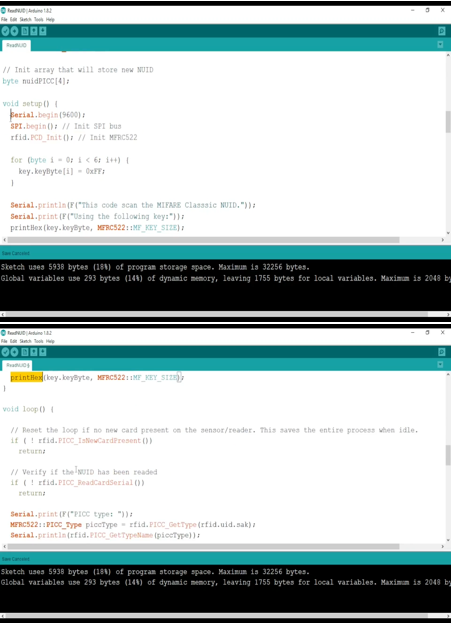
The following code will help you to make RFID Door Lock System Using Arduino.
Code
Description
Download Code
