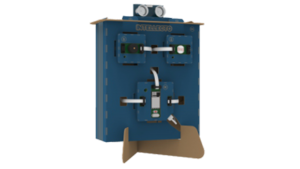

Description:-
Design a smart alarm that will wake you up. The smart alarm doesn’t turn off until you get up and stand in front of it. Super cool way to get up on time!
Place it near the window where it can sense the sunlight.
Tip – You can also use it as a Person Counter.
Unboxing of Intellecto kit:-
Intellecto is an IoT-Based coding kit that enables children of age 12+ to understand the key concepts of IoT and fundamentals of coding in a fun and engaging way. It is an open-source compatible kit designed to develop 21st-century skills in children to make them future-ready.
The kits include ready-to-make models like smart alarm using which you can save time and give shape to ideas in an easy and fun-filled manner.
Construction of Smart Alarm:-
For the construction of the smart alarm, you required four cardboard sheets E1, E2, E3 & E4. Each building structure has its own customized parts name, which has been written as EA, EB, EC, and so on. Which will help in constructing the smart alarm. You can download the manual from here.
Your Smart Alarm Structure is ready. Now you are ready to play it using mobile application.
Download BixChamp app:-
Install the Mobile App to Play with the Structure-based Activities and Circuit Blocks:
Offline mode:-
Your Intellecto Kit CPU block comes with preloaded code, that makes it compatible with the Mobile App. The App connects with the CPU block using a wifi Connection. Every CPU has a unique WiFi Name.
For E.g. – INTELLECTO_12345
Online mode:-
To transfer data or control the devices Over The Air (OTA). We have to provide internet access to both the hardware as well the mobile phone.
Follow the steps for the connection of hardware to the internet:-
- Open the BixChamp app and go to Intellecto>Online mode.
- Enter the Adapter SSID and Password in the text input box.
- After entering the wifi credential your hardware device is ready to connect to the internet and can work remotely.
- Now disconnect the wifi connection between mobile and Intellecto CPU and perform the activity.
The SSID and the password provided above are the wifi credential by which the hardware will be connected.
Software download:-
Text-based coding is essentially typing instructions in a programming language following a syntax. Syntax is the grammar and spelling rules of a programming language.
For downloading the text based software click here.
Firmware and Library installation:-
Board installation:-
The installation method requires Arduino IDE version 1.6.4 or greater.
- Open Arduino go to File > Preferences menu item.
- Enter the following URL in Additional Boards Manager URLs:
http://arduino.esp8266.com/stable/package_esp8266com_index.json
- Open the Tools > Board > Boards Manager… menu item.
- Search for ESP8266 and install it.
Library Installation:-
Download the required libraries:-
- Open Arduino go to Sketch> Include Library> Add .zip library menu item.
- You will be prompted to select the library you would like to add.
- Navigate to the .zip file’s location and open it.
Firmware Installation:-
Their are two process by which you can install the firmware in your CPU board, let’s see them one by one.
For downloading the firmware click here.
- You can follow the library installation method by which you can include the .zip file as the library and you can then open it from the example section.
- Secondly, you can directly extract the .zip file and open the .ino and upload the code in the CPU board.

